
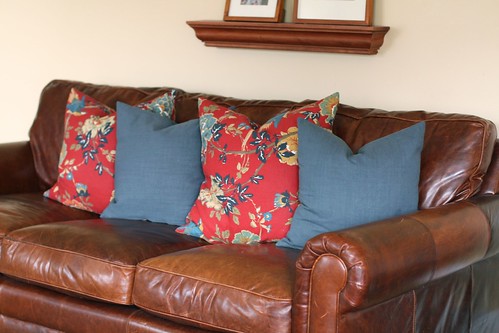
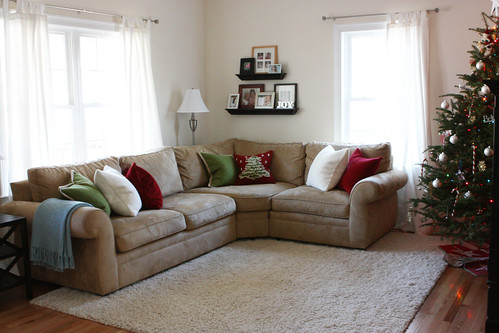
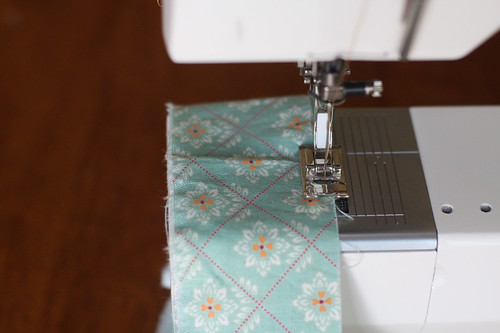
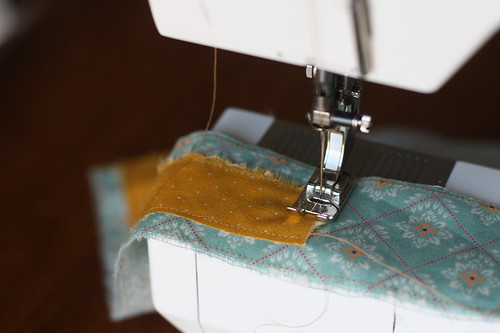
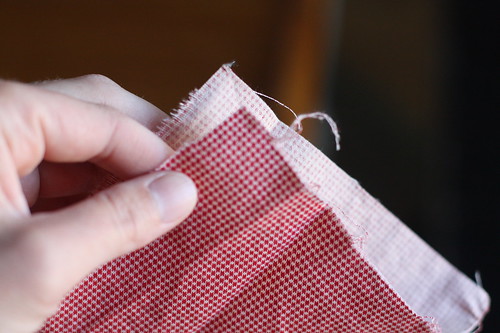
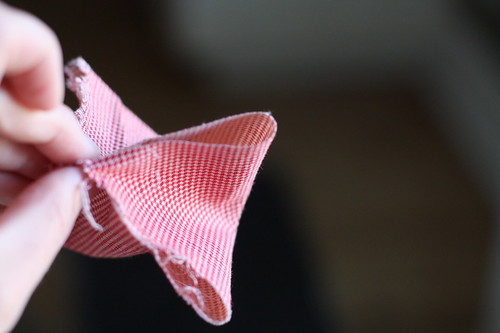
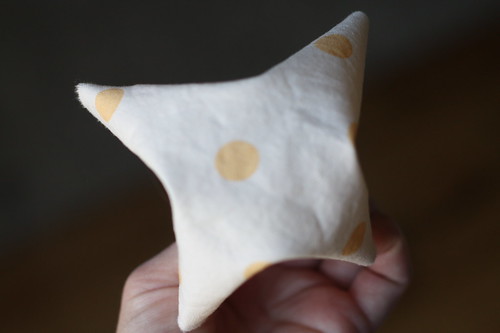
I wanted to share the tutorial I use to make pillow covers with. I love it because it has a hidden zipper so you can wash them and switch them out with the seasons. It is a little tricky to understand the first time through, especially if your fabric is all one color like mine. Please ignore my thread, I get lazy with making sure the thread matches and just use what I have on hand :)
Saturday, March 19, 2011

Tuesday, February 15, 2011
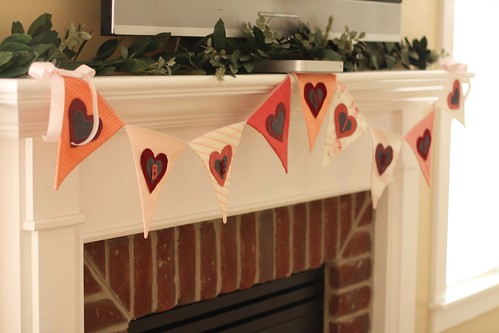
Valentine Banner
Here it is, I wasn't thrilled with the outcome. If you decide to do one next year you will have to call me and I will let you know what I would do different!
Saturday, February 12, 2011
Valentine Heart Clips
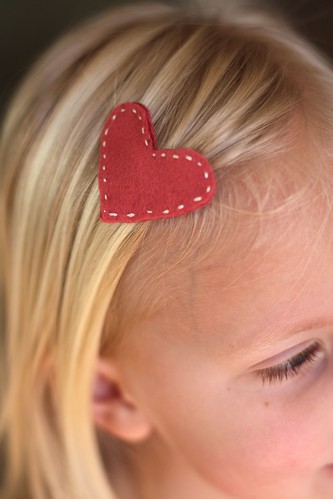
We made a few of these heart clips found on the Purlbee. I couldn't find the tiny clips so ours were a little bigger. Do you have any leftover felt? I thought you and your girls might like making these together.
Tuesday, February 8, 2011
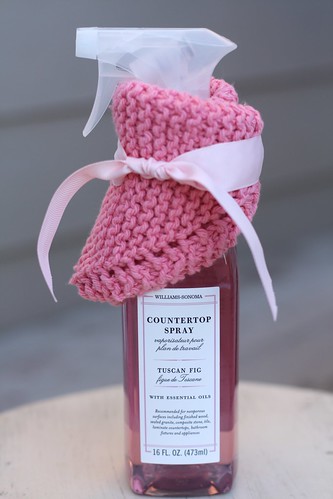
Knitted Dish Cloth
This is a easy dish cloth or hot pad to knit!
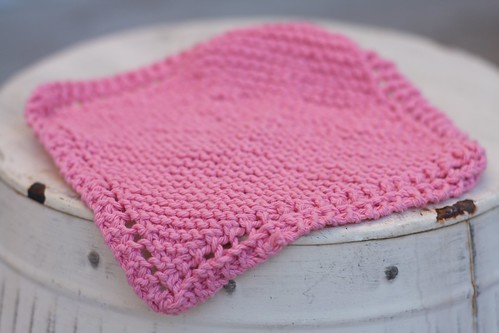
It makes a fun gift coupled with the countertop spray!
You will need
1 skien cotton yarn
(I used Lily Sugar and Cream yarn)
(I used Lily Sugar and Cream yarn)
knitting needles size 10. (I actually used 7 and then just casted on a few more stitches.)
Cast on 4 stitches
Row 1: K, across
Row 2: K 2, yo K to the end of the row.
Repeat row 2 until there are 43 sts on needle.
Decrease rows: K 1, K 2 tog, yo, K 2 tog, K to the end.
Continue until 4 st remain. Cast off remaining sts.
I add as many stitches as I can fit on my needles to increase the size a bit.
Tuesday, February 1, 2011
Amazing Molten Cakes

4 squares BAKER'S Semi-Sweet Chocolate
1/2 cup (1 stick) butter
1 cup powdered sugar
2 eggs
2 egg yolks
6 T flour
Preheat oven to 425°F. Butter four 3/4-cup custard cups or soufflé dishes. Place on baking sheet. Microwave chocolate and butter in large bowl 1 min. or until butter is melted. Stir with wire whisk until chocolate is completely melted. Stir in sugar until well blended. Blend in eggs and egg yolks with wire whisk. Stir in flour. Divide batter among prepared custard cups. Bake 13 to 14 min. or until sides are firm but centers are soft. Let stand 1 min. Carefully run small knife around cakes to loosen. Invert cakes onto dessert dishes. Serve immediately, topped with warmed berries.
Friday, January 21, 2011
Baby Ugg Booties
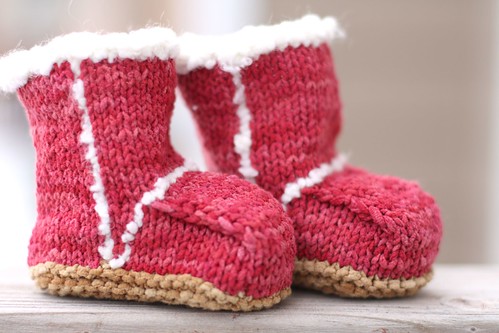
These fun booties are much easier to knit than you would think! Give them a try!
Click on this tutorial first. It will help with the materials you need the steps you will take.
Size 3-6 months use size 4 and 5 needles
Size 9-12 months use size 5 and 6 needles
Start with yarn for bottom of bootie.
To begin:
cast on 26 Stitches and knit 1 row.
Row 1: k1, yf, k11, [yf, k1] twice, yf, k11, yf, k1.
Row 2, 4, 6, 8, 10: knit (when you reach the yf knit in the back of the stitch).
Row 3: k2, yf, k11, yf, k2, yf, k3, yf, k11, yf, k2.
Row 5: k3, yf, k11, [yf, k4] twice, yf, k11, yf, k3.
Row 7: k4, yf, k11, yf, k5, yf, k6, yf, k11, yf, k4
Row 9: k5, yf, k11, [yf, k7] twice, yf, k11, yf, k5.
Next
Change to larger needles for main part of bootie. Change color too if wanted.
Rows 11, 13, 15, 17: knit.
Rows 12, 14, 16, 18: purl.
Shape Instep
Row 1: k 29 , SKP, turn.
Row 2: sl 1, p 7, p 2 tog, turn.
Row 3: sl 1, k7, SKP, turn.
Row 4 -13: repeat rows 2 and 3 five times.
Row 14: repeat row 2.
Row 15: sl 1, k7, SKP, knit to the end of the row.
Row 16: p 21, p 2 tog, purl to the end of the row (35 stitches).
Next
Work in st st ( knit 1 row, purl 1 row) for 2 ", ending with a purl row.
Then
Change to plush yarn and work 2 rows knit, then bind off in knit.
Finishing
With Plush weave yarn under and over stitches on sides of booties and over the instep. Sew bottom and back of booties shut with large eye needle and mattress stitch.
Friday, January 7, 2011
Tackling the Bedtime Routine.
1. Make a plan of what you would like to see happen and stick too it for at least a couple of weeks until it becomes the new routine. We make exceptions once in a while now and in the summer we start the routine later, maybe at 9.
2. Inform your kids of the new plan hours before bedtime and remind them of it.
3. Set an alarm on your phone to announce bedtime. I choose the "ALARM" sound on my phone because it's loud and it gets their attention. This way the phone is the bad guy :).
The Plan:
-Alarm goes off at 8 p.m.
-Kids moan :)
-We all pick up. The kids each have assignments. Ben is over the Family room so he fixes the pillows on the couches how I like. Jonah has the mudroom so he puts shoes away.
-We all go upstairs. I turn off all lights on the main floor so they know we are done with food, computer or anything else on the main floor.
-Once upstairs it's the usual pj's, teeth brushed, prayer and reading till lights out at 9:00.
That's the plan, Halle is my best at just doing what she is supposed to. The boys are wild indians so I have some incentives for them. I need my boys to be good while I read with Halle and put Luke to bed.
-I fold down my bed and throw on a bunch of pillows. They are allowed to read in our bed if they have done what they were asked and are reading quietly. This really helps if they are fighting or one is causing problems, the one who is being good gets rewarded and separated from the other. They love to snuggle into our bed with a book so it works.
-The other incentive I told you about. Foot rubs with yummy smelling lotion for anyone who does just what they should without me asking twice. I use this when Chase is at YM's or out of town. They love this one on one attention, they talk while I rub their feet and i'm all ears.
If they will not obey they lose privileges for the next day and I put them to work. I let them know that this is my time to clean up the house a bit and if they have too much energy to go to bed they can help me. They pick up the toy room or I hand them a rag and they wipe down walls. They usually learn that they would rather read in bed and if not I can find plenty for them to do and I get a clean house!
So there it is! Probably more info than you wanted but it's working and I hope it helps you with ideas!
Thursday, December 16, 2010
Christmas at our house in Boston!
At high noon it is still pretty dark for me!
Pretty Simple I might say. I love your house more than mine of course! I'm doing my best to make this rental home mine, but I dream of the day I might have a home of my own. Merry Christmas!
Sunday, December 12, 2010

Sunday, July 18, 2010
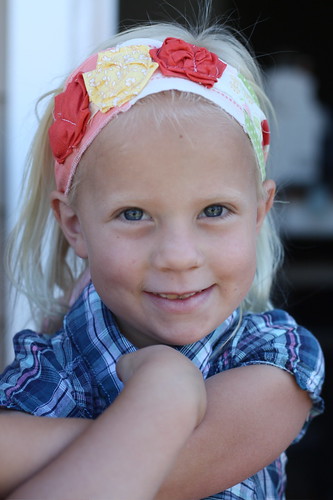
Here's my first one!
Thanks so much for this fun idea! I made this headband after Sunday dinner tonight. I was surprised at how fast it came together. I wasn't sure how to off center the second strip so I just did what I thought looked good which was centered it and then off set the flowers, if that makes sense. We will have to talk about that! If it works, it works right? Kiley started putting together her favorite fabrics for another try at it tomorrow. Can't wait.
Friday, July 16, 2010
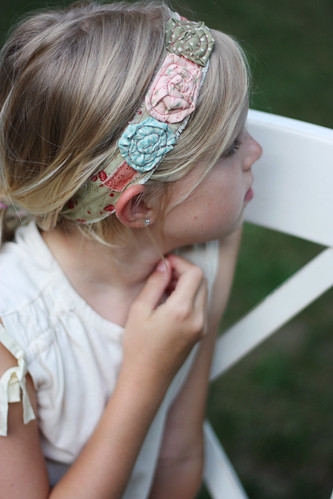
Scrappy Headbands
Heather I am excited to share these headbands with you! I thought it would be a fun project for you to do with your girls this summer. All you need is your sewing machine, thread and scraps of fabric!
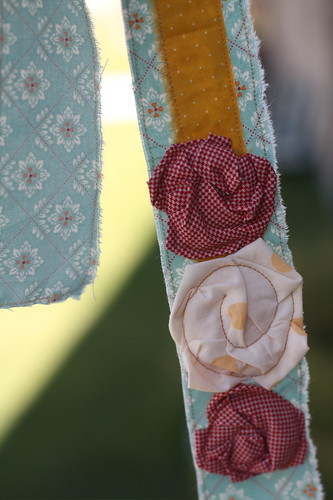
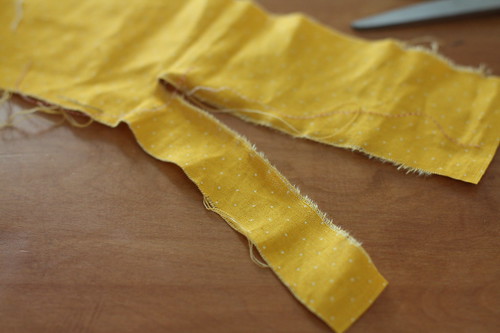
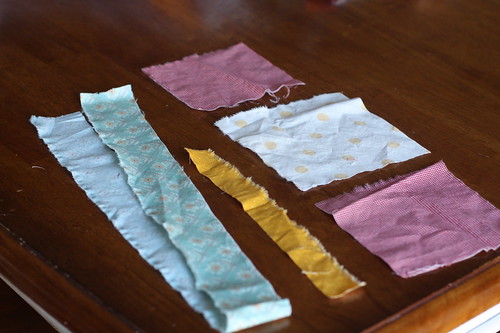
There is no real right or wrong way to make these. They can be as wide as you want and as scrappy as you like. The largest piece of fabric will need to be about 32 inches long and two inches wide. Cut the fabric at 2 inches (or however wide you want it) and then rip the fabric the entire length to create the frayed look.

Your next fabric will be about 10 inches long and 1 inch wide. Again I rip along at least one edge.
Last you will need 3 squares of fabric about 5 1/2 by 5 1/2 inches. These squares are for the flowers and may vary in size depending on how large or small you want them.
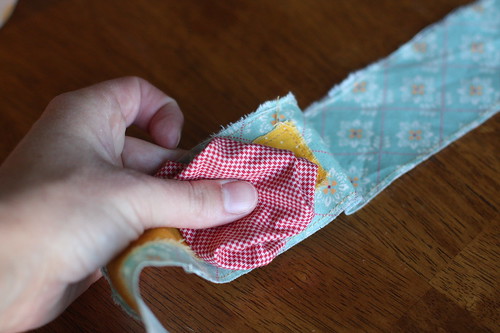
Sew along the edge of the largest piece all the way around.
Then sew the smaller strip onto the larger one. Place it off center on the larger strip length wise and center it width wise.
Now the flowers. Grap a square of fabric and fold it with two corners together, triangle ways.
Then pull in the other two corners so that you are holding all four.
Turn the fabric over and with your free hand twist and flatten slightly.
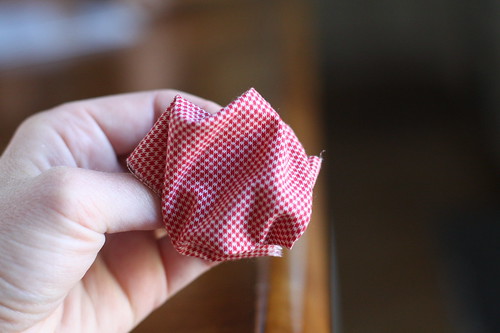
Place flower onto the center of the headband.
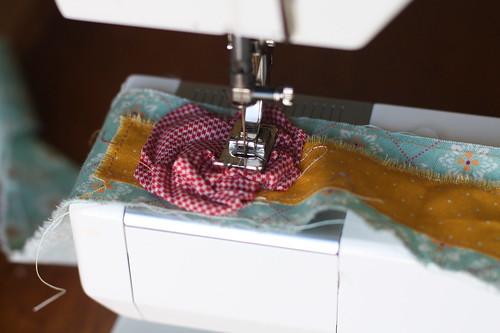
Place under sewing foot, lower foot and sew around the edge of the flower folding fabric in and under as needed as you sew. Every flower will be unique! If you see edges you can tuck them in and under.
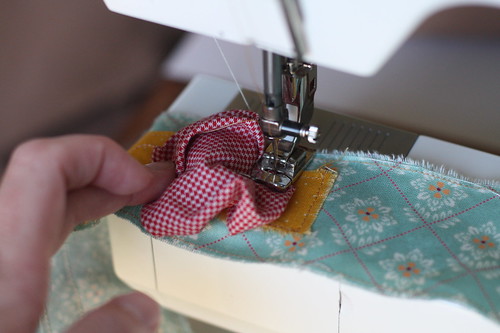
Once you have sewn around the edge, keep sewing and make a circular pattern to the center of the flower.
Next flower! I do three flowers and place them going from the center and away from the 1 inch strip on the headband.
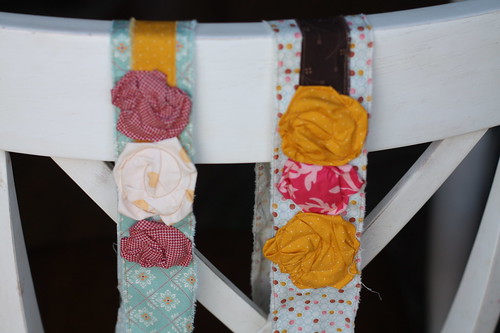
You can also strip piece the largest piece of fabric.
Great way to use up our fabric scraps huh? Enjoy!
Thursday, June 17, 2010
My New Favorite Chocolate Chip Cookie!
It's actually a coconut cookie that I add chocolate chips to.
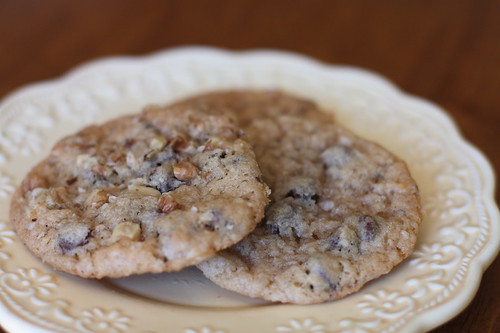
Click here for the recipe!
Heather, as you can see, my aperture was too low to get all the cookies in focus. I think I was at 2.0. Not something I was willing to mess with for the cookies but something I will make a mental note of!
Heather, as you can see, my aperture was too low to get all the cookies in focus. I think I was at 2.0. Not something I was willing to mess with for the cookies but something I will make a mental note of!
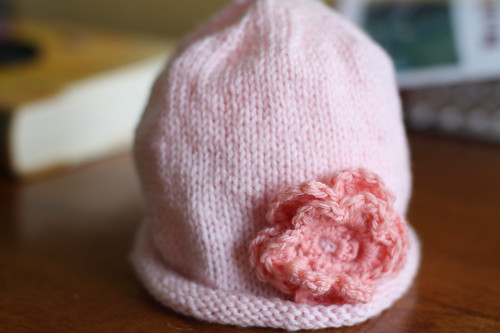
Monday, May 24, 2010
Pink
I never cared much for pink until I had Halle Jane. Now I can't get enough of it!
It's Monday, my cleaning and laundry day. But I am posting because it's May, the end of May and it's been snowing all morning.
It's Monday, my cleaning and laundry day. But I am posting because it's May, the end of May and it's been snowing all morning.
Tuesday, May 4, 2010
Happy Birthday Heather!
A little message on your birthday...
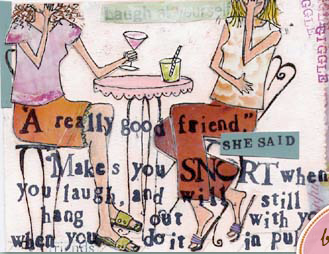

There are very few people that I laugh with as hard as I laugh with you. I love when we are all worn out on life but we choose to laugh and end up crying because we are laughing so hard.
Thank you for being my lifelong friend. Hope your day is great!
P.S. This card comes from curlygirldesign. Check out her website, it's so cute. I just found out that she lives in Boston.
Subscribe to:
Posts (Atom)